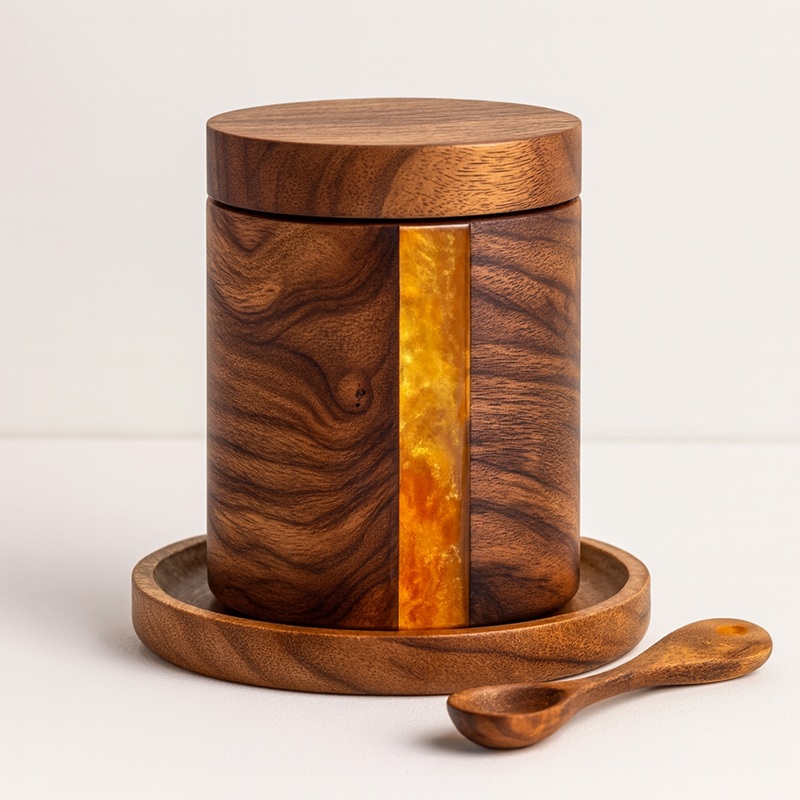
Part 2: Wood-Resin Combination Process (1): Wood Preparation & Resin Selection
If you want good quality of wood and resin combined spice Jar, jewelry box it is important on material preparation—wood preparation and resin selection directly determine the bonding effect, durability, and finish of the final product. For B2B buyers, understanding these two steps helps you better judge product quality and communicate customization needs with manufacturers. This blog details the core points of wood preparation and resin selection in the production process.
2.1 Wood Preparation: The Foundation of Strong Bonding
Wood quality is the basis for successful wood-resin bonding. We strictly follow three steps to ensure the wood meets production standards:
Step 1: Wood Species Selection
We prioritize high-density wood for homeware production, such as oak, walnut, and pine. These woods have better resin absorption and structural stability, which can effectively prevent peeling and cracking after bonding with resin.
We do have FSC certification. FSC certification is crucial for wood-based homeware B2B businesses to ensure sustainable forest management, traceable wood supply chains, meet global environmental compliance (e.g., EU DR), and gain trust from buyers prioritizing responsible sourcing.
Step 2: Drying Treatment
Excess moisture in wood is the main cause of bubbles and poor bonding. We dry the wood to a moisture content of 8-12% through air-drying or industrial ovens. This ensures that no bubbles are generated when the resin is poured, and the wood does not warp due to moisture evaporation during the resin curing process.
Step 3: Sanding & Cleaning
The wood surface is sanded to create a smooth, porous texture—this helps the resin penetrate tiny gaps and make it firm. After sanding, we wipes dust to ensure no contaminants block the adhesion between wood and resin.
2.2 Resin Selection & Preparation: The Key to Bonding
We use epoxy resin for homeware production, which is the most suitable resin for wood bonding due to its low viscosity, high transparency, and strong adhesion. The preparation process is also important:
Step 1: Resin Selection
We select food-grade, non-toxic epoxy resin that meets EU REACH and US FDA standards—safe for home use and meet with global import regulations.
Step 2: Mixing Resin & Hardener
Resin and hardener are mixed and using a low-speed stirrer. Over-stirring is avoided to prevent air bubbles, which would affect the transparency and aesthetics of the final product.
Step 3: Tinting
For colored resin, we add non-toxic to mix evenly, supporting custom color schemes for B2B clients.
For color choosing, client is able to provide Pantone color for reference.
In Part 3, we’ll focus on the core steps of wood-resin bonding: molding methods and curing techniques. Stay tuned!
#WoodResinProcess #HomewareManufacturing #B2BHomeware #WoodandResinJewelryBox #WoodandResinSpiceJar


 IPv6 NETZWERK UNTERSTÜTZT
| Der Blog
| Sitemap
| XML
| Datenschutzrichtlinie
IPv6 NETZWERK UNTERSTÜTZT
| Der Blog
| Sitemap
| XML
| Datenschutzrichtlinie
Unsere Öffnungszeiten
Mo - Fr: 9 - 18 Uhr
Sa - So: geschlossen
(alle Uhrzeiten sind Eastern Time)
 Deutsch
 English
 español
 français
 العربية